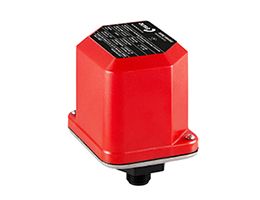
Alarm Pressure Switch
Catalog Code: DPS10-1 / DPS10-2
Alarm Pressure Switch DPS10-1 / DPS10-2
In the installation where the Alarm Pressure Switch will be installed, a strainer must be used and the water flow must be free of impurities. The product will not work in water flow containing dirt and particles.
* The pressure switch must be mounted vertically as shown in the figures.
* Personnel authorized in electrical devices and expert in the use of the product should start the installation according to the following installation sequence.
* After wrapping teflon tape on the 1⁄2" threaded part of the product, 1⁄2" installation should be done. Excessive torque should not be applied to the product during installation.
* For electrical connection, the red protective cover is removed with the help of the special key included in the box.
* After the red protective cover is removed, NO, NC and COM sections will be seen on the switch.
* Visual or audible alarms can be received from these sections. A signal can be sent to the fire control panel.
* Product pressure adjustment can be made from the frame. After the product is set to the desired pressure range, the red protective cover should be closed with the help of screws.
* After the installation of the product is completed, it should be checked at least 3 times whether a signal is received from the product.
* Every month periodically, it should be checked whether there is leakage in the product and whether the product gives a signal with the test valve in the line. Products with leakage and signal problems should not be used.
Specifications
Standarts


